Previous Tutorial: Spawn Production

Once your inoculated
grain spawn has reached 100% mycelial colonization, it is now time to spawn it to a bulk substrate, like our
pre-pasteurized mushroom compost.
If you don't know how we got to this step, please read the previous tutorial.

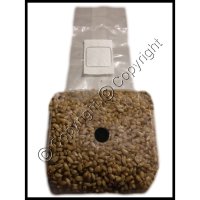
Once the bag is completely colonized with mycelium (you should not be able to see any uncolonized grain), break the grain up with your hands through the outside of the bag. Make sure the grain gets broken up completely and thoroughly.

Once the grain bags are completely colonized with mycelium (you should not be able to see any uncolonized grain), it is time to prepare your
MycoMix™ substrate and mix your colonized grain into it. The first step of this process is to accurately measure 44 fluid oz. (5.5 cups; 1300 mL) of clean water (store-bought spring water is recommended). Add the water to a heat-safe pot and place atop a stovetop burner. Adjust heat to HIGH.

While waiting for the water to reach a boil, open the bag of
MycoMix™ and pour it into a bucket
with lid that is between two and five gallons in size.

Bring water to a rolling boil for one (1) minute.

Carefully remove the pot of boiling water from the stovetop and pour into the bucket containing the
MycoMix™.

After pouring the boiling water into the bucket, IMMEDIATELY seal the bucket with the bucket lid. The contents will be very hot and the steam may partially break the seal of the lid. If this happens, let the steam vent for a few seconds then reseal the lid.

Pick up the bucket and shake it violently in a vertical motion for approximately two minutes. You will want to grab the bucket in such a way that your hands are exerting pressure down on the lid while you are shaking. This will help prevent the lid from popping off. The heat inside of the bucket may pop the seal of the lid while you are shaking the bucket. When this happens, simply crack the lid to quickly vent the steam, then reseal the lid and continue shaking. It is normal for the heat to break the seal of your lid and it may happen several times throughout the two minute shaking process.

Let the sealed bucket sit for eight (8) hours. It is very important that the bucket is left to sit for a full eight hours. If you attempt to proceed to the next step prematurely, the heat from the mixture could kill your spawn.

Prepare your
inflatable monotub by inflating it, plugging the gas exchange holes with the provided
red caps, and lining the bottom with the provided plastic
monotub liner. Wipe down the inside of the monotub, the underside of the lid, and the plastic liner with isopropyl alcohol then put the lid on the tub to keep airborne contaminants out.

Break up both of the colonized grain bags with your hands through the outside of the bag. Make sure the grain gets broken up completely and thoroughly.

Cut off both bags of broken-up
colonized grain (the bags that you previously broke up) directly below the filter-patch with a clean pair of scissors.

Remove the lid from the bucket of blended
MycoMix™ and pour the contents of both grain bags into the bucket.
This step should be performed in a sanitized area with limited airflow (like a walk-in closet).

Reseal the lid on the bucket then shake the bucket in a vertical motion for approximately two minutes until you are satisfied that the colonized grain is thoroughly blended with the MycoMix™.

Remove the lid from the
monotub and pour the contents of the bucket on to the plastic liner in the bottom of the tub.

After sanitizing your gloves with isopropyl alcohol or
hand sanitizer, use your gloved hands to level out the substrate across the bottom of the monotub into an even layer. Do not tamp or pat the substrate down.

Put the monotub in a dark place that will maintain a temperature between 75-81°F. Disturb the tub as little as possible during this time period and
do not open it until colonization is complete. It will take approximately 5-14 days for the substrate to completely colonize with mycelium (you will be able to tell if it has completed colonization when the substrate has turned completely white). Your substrate should look similar to the photo above.
Next Tutorial: Fruiting Conditions


